GL Journal
GL Journal Components
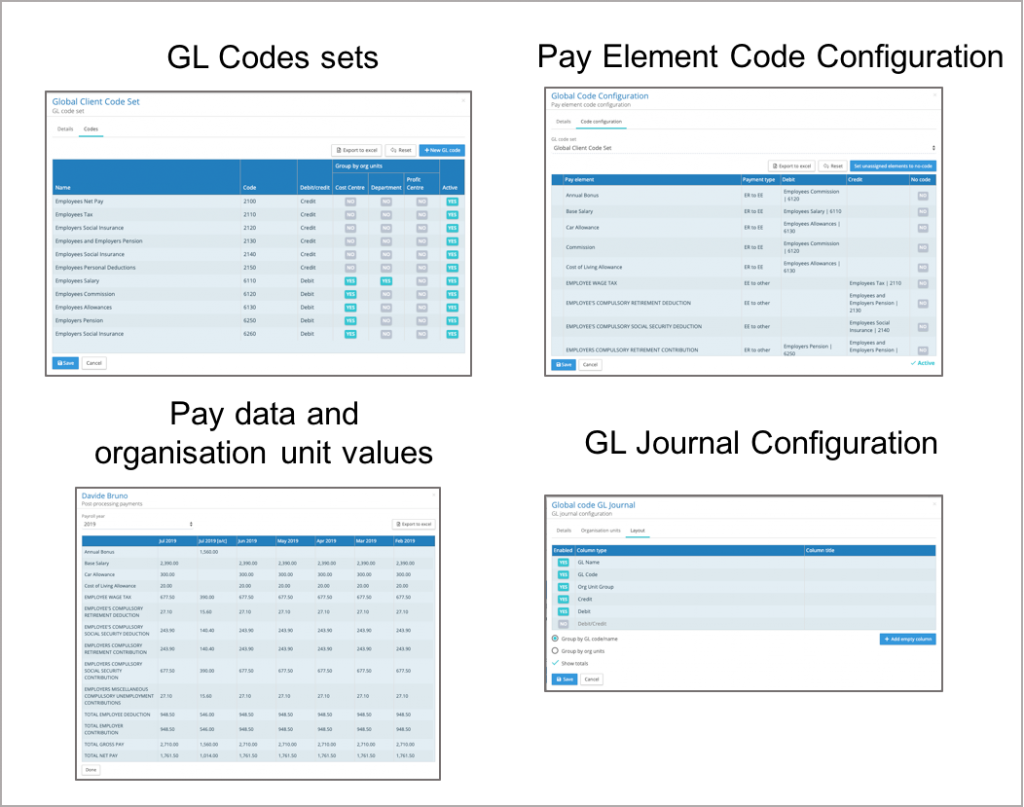
GL Codes Sets – The code sets hold the GL Name and Code plus information relating to how that code is grouped by organisation unit(s).
Pay data and organisation units values – The per pay period employee pay data and their organisation unit value
Pay Element Code Configuration – The assignment of GL codes to specific pay elements.
GL Journal Configuration – Defines which Pay Element code configuration is being used for the report, the order in which GL codes and organisation units are grouped by and the layout of the report.
GL Code Set forms part of the GL Journal configuration
It is important to understand the relationship between the GL code set and the GL Journal configuration. The GL Code set governs which organisation units an individual code can be grouped by. The combination of GL Name and GL Code creates a unique code.
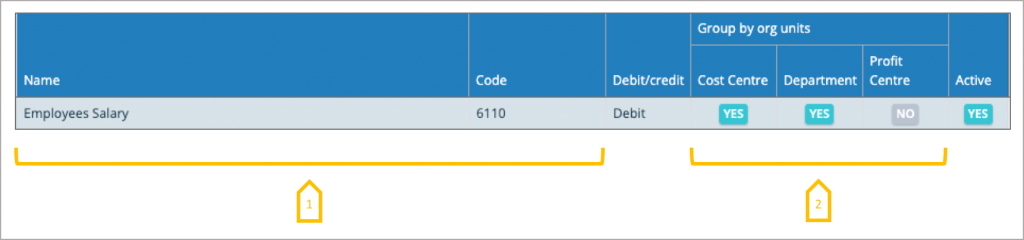
- The combination of GL Name and Code makes a unique GL entry, if there multiple Names for the same GL Code, there will be multiple GL Journal lines in the GL Journal report.
- Defines which org units used to group the GL code in the GL Journal, please note this does not define the org unit order, this is defined by the GL Journal Configuration.
Accessing GL Journal Configurations
To start a GL Journal configuration go to Payrolls, from the action button click on reporting → Configurations → GL Journal. This will bring up a list of GL Journal configurations already created and the option to create a new GL Journal.
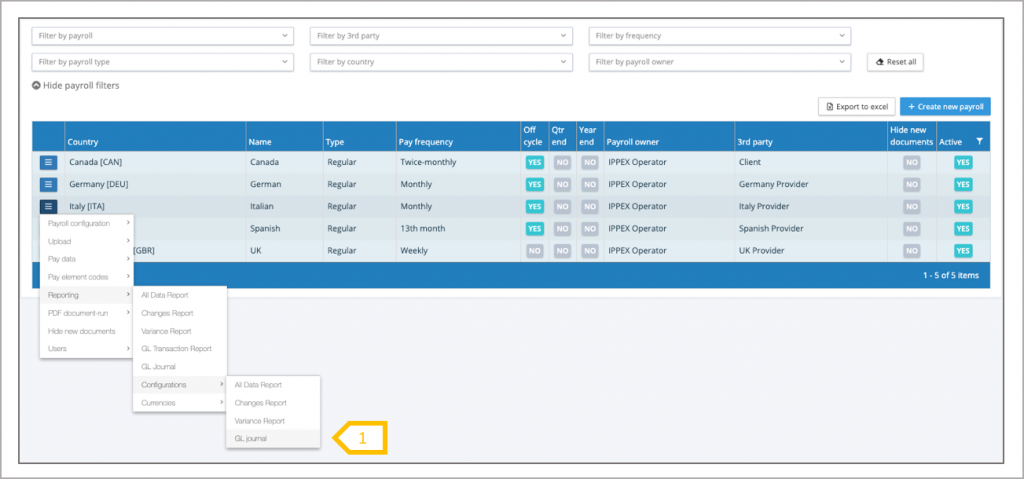
- Click on GL Journal
GL Journal Configuration List
Any number of GL Journal configurations can be produced, old configurations can be set to inactive. Existing configurations can be edited and new configurations can be created.
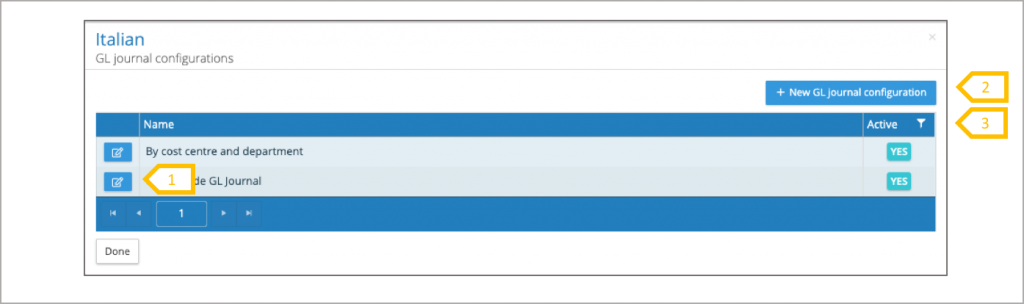
- Edit existing configuration.
- Create a new configuration.
- View active and/or inactive configurations.
Creating a new GL Journal configuration – Details
There are three configuration tabs, details, organisation units and layout. Complete the details page and move onto the organisation units.
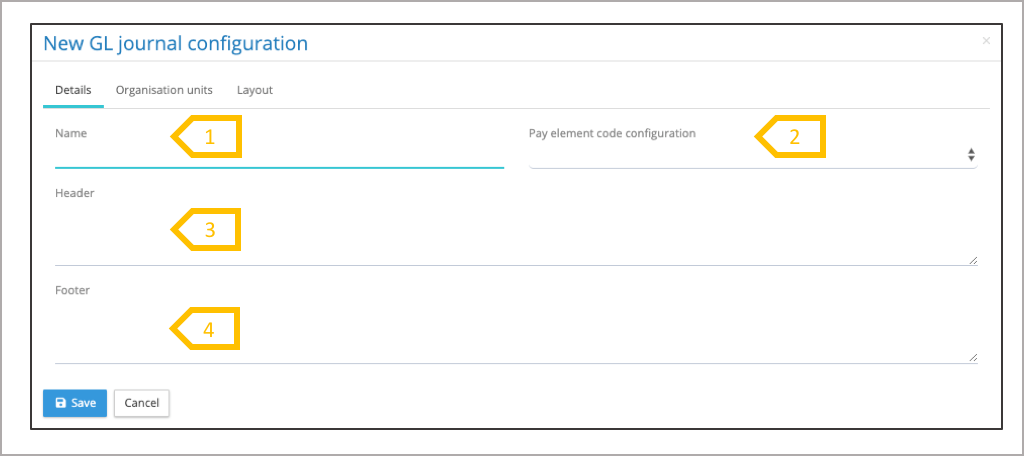
- Enter a name for the configuration.
- Select the pay element code configuration which is going to be used by the GL Journal report. If a pay element code configuration has been set up as the default, this field will be populated with that configuration. An alternative configuration can be selected.
- Header (optional), text to appear above the GL Journal.
- Footer (optional), text to appear below the GL Journal.
Creating a GL Journal configuration – Organisation Units
Organisation unit tab has two purposes, set the order in which the pay data is summated and to define which organisation units are required in the GL Journal report. In this example below the report will have a column for Cost Centre followed by a column for Department. For those GL codes defined in the GL code set with a grouping by Cost Centre and Department, the GL code will be summated by Department and then by Cost Centre.
If a GL code has been configured to be grouped by Cost Centre and Department, and the Cost Centre is the only org unit selection, the report will only summate the data by Cost Centre.
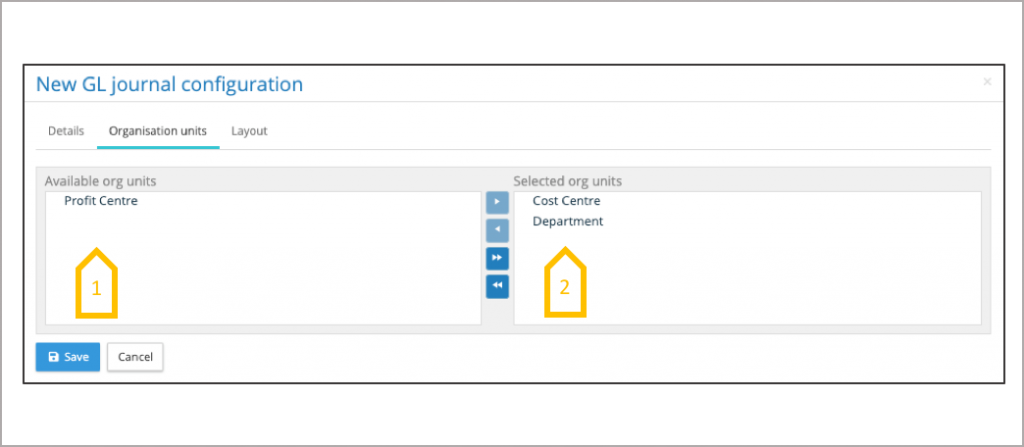
- Drag and drop the organisation unit into the selected organisation units pane or use the transfer arrows.
- Order the organisation units to define the way the GL code values are summated. The assigned organisation units is called Org Unit Group which is used in the Layout tab.
GL Journal configuration – Layout
For most GL Journals the GL Code is summated by one or a number of organisation units e.g. Cost Centre and/or Department. The GL Journal configurator provides an option to enable the Organisation unit to be summated by GL code. The default option is the former. See the radio buttons on the layout tab.
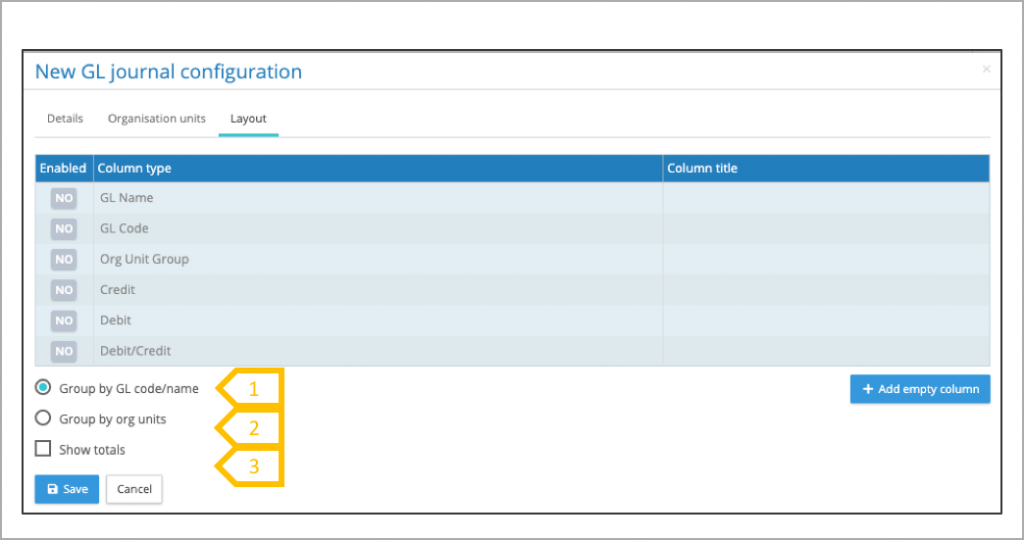
- Group by GL code/name, the report will take each GL code/name and summate the data by the organisation unit(s) where required.
- Group by org units, the report will take each org unit(s) and summate the data by the GL code/name.
- Check the box to add totals to the report
GL Journal configuration – Layout continued
The final step in the configuration process is to set-up the layout of the report, select which columns to appear in the report, change the name of the column headings where required, select the order of those columns and where needed add blank column spacers to the report.
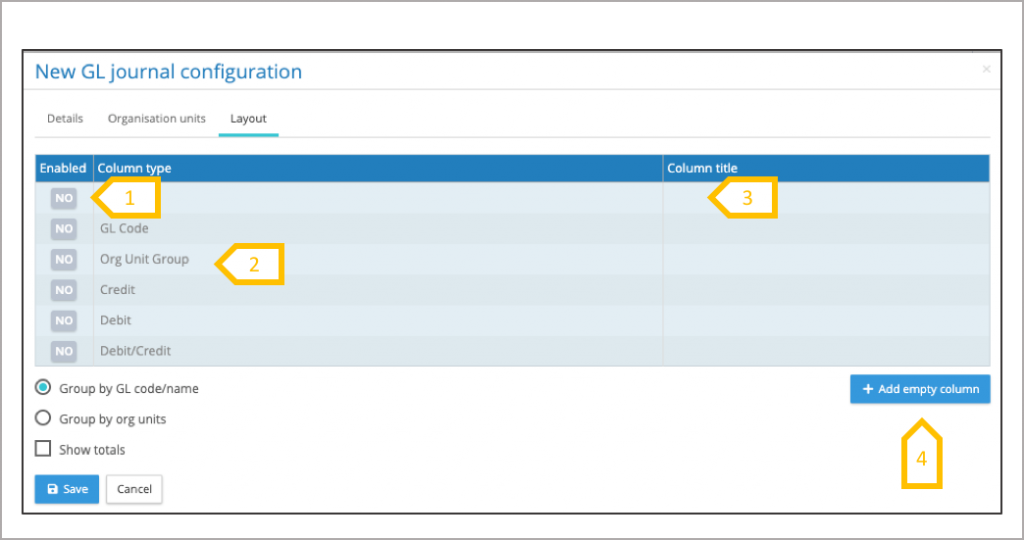
- Select the data required for the report.
- Slide the column heading up and down into the order required for the report.
- Add an alternative heading name if required..
- Insert a blank column, when selected it will placed at the bottom, slide it into position required and it can be given a heading name.
GL Journal Report
Using the action button next to the payroll select reports and GL Journal, this will present a report kick-off page. Enter the parameters for the report and click on generate report. The report will be processed in the background and the user will receive a report completion email when it is ready. Go to my files, opening GL Journals and payroll folder to retrieve the report.
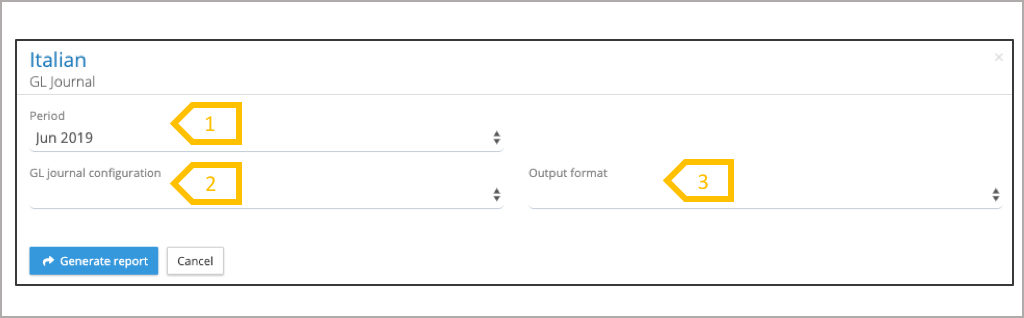
- Select the pay period, it will default to the current period based on the next pay date.
- Select the GL Journal report configuration. 3.Select the report output format, Excel or CSV.