IPPEX Cloud V 1.22 & 1.23 Release Notes

Introduction
This is a combined release note for release 1.22 and 1.23.
Version 1.22 IPPEX has integrated an SFTP service with the payments process and the file management system, making it easier to securely produce ‘tamper free’ employee payment files for transmission to a banking institution. Along with some minor changes and security updates to the transfer folder hierarchy, it is important to read the notes below to ensure all users who utilise the transfer folders are aware of the modifications.
Version 1.23 brings the ability for clients and in country partners to selectively view the full dashboard giving the ability to monitor and act upon tasks prior to those assigned to you. Tenancy implementations can now create tasks prior to the periods calendar creation date. Closing comments have been added to tasks
SFTP Service
System administrators have the facility to configure secure file transfer services with the IPPEX Cloud system for payment files. IPPEX have enhanced the payment file creation process to prepare a payment file to be routed via SFTP to the payments processing organisation. There are two configuration steps required before a payment report can be transmitted via SFTP:
SFTP Configuration
The first step is to enable the tenancy for SFTP connections, go to administration ® System ® settings and check the SFTP box and save.
Now set up the STFP service connection, go to administration ® SFTP configuration. This presents a list of any existing SFTP configurations and new ones can be created.

Click on + New SFTP Connection.
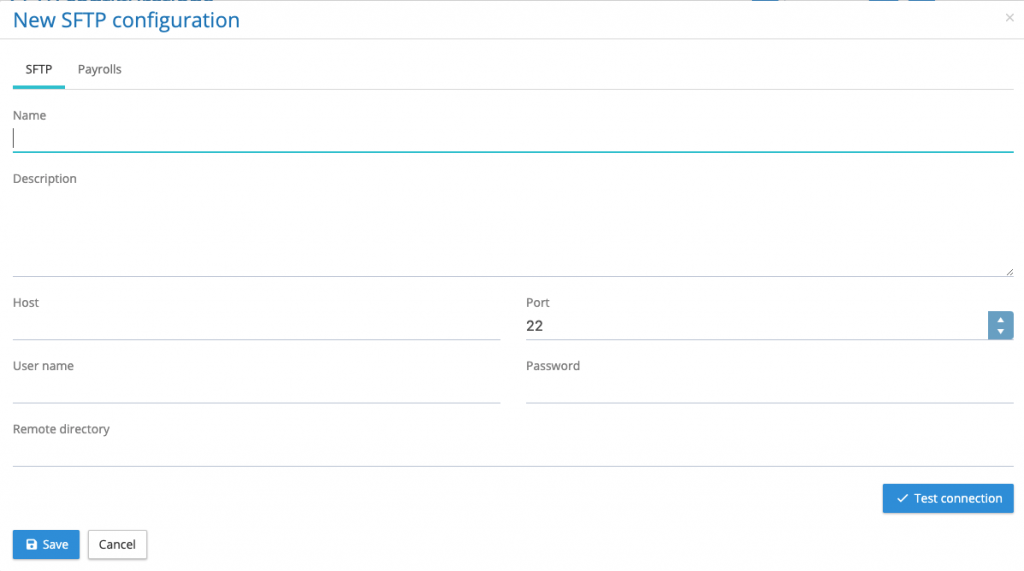
Under the SFTP tab complete the following fields:
- Name – Give the configuration a meaningful name
- Description – Add a description (optional)
- Host – Enter the host SFTP IP address
- Password – Enter the password given to you from the receiving organisation
- Remote Directory – The receiving party may provide a directory, place this information in this field.
Now test the connection. Please note the connection test cannot test the remote directory.
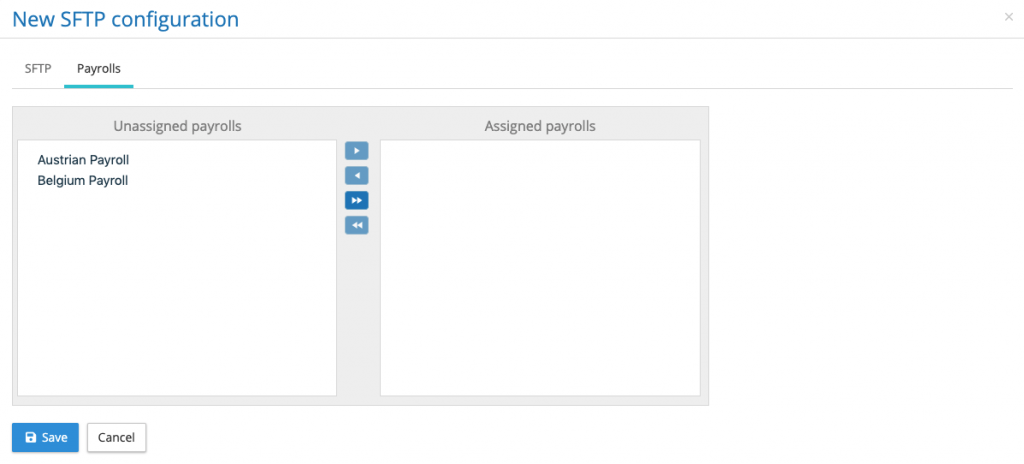
Click on the Payrolls Tab and assign the payrolls to which the SFTP service should be accessible.
The final step is to Save the configuration.
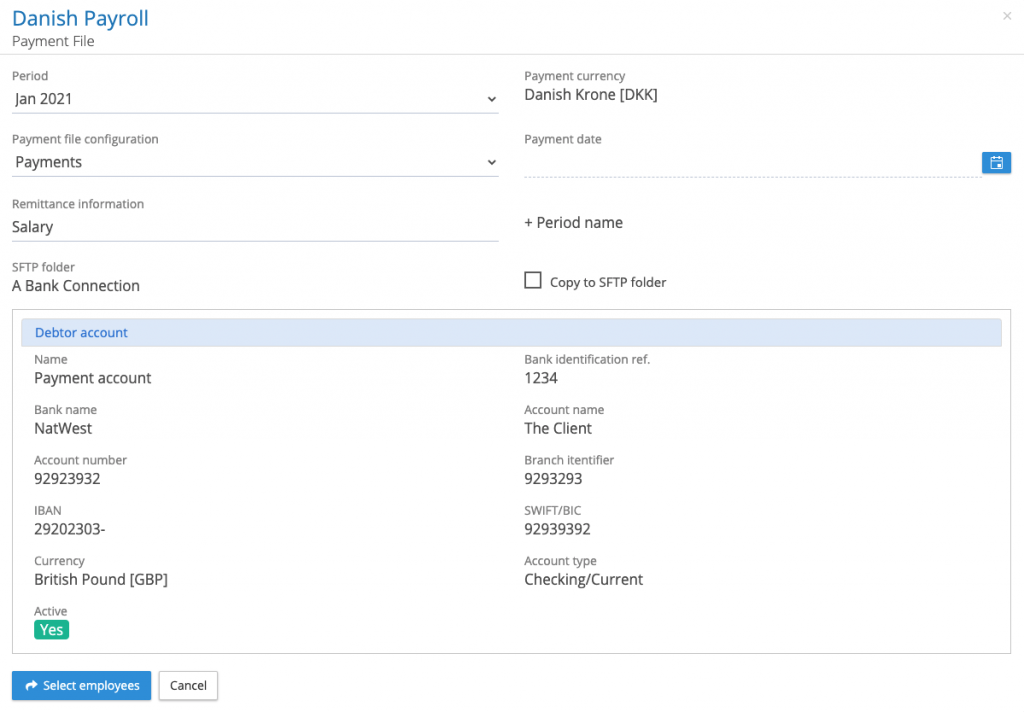
Payroll Payment File Configuration
A payroll payment file configuration has to be configured for the SFTP server. Go to payrolls and open the payment file configuration, there is a tab called SFTP.
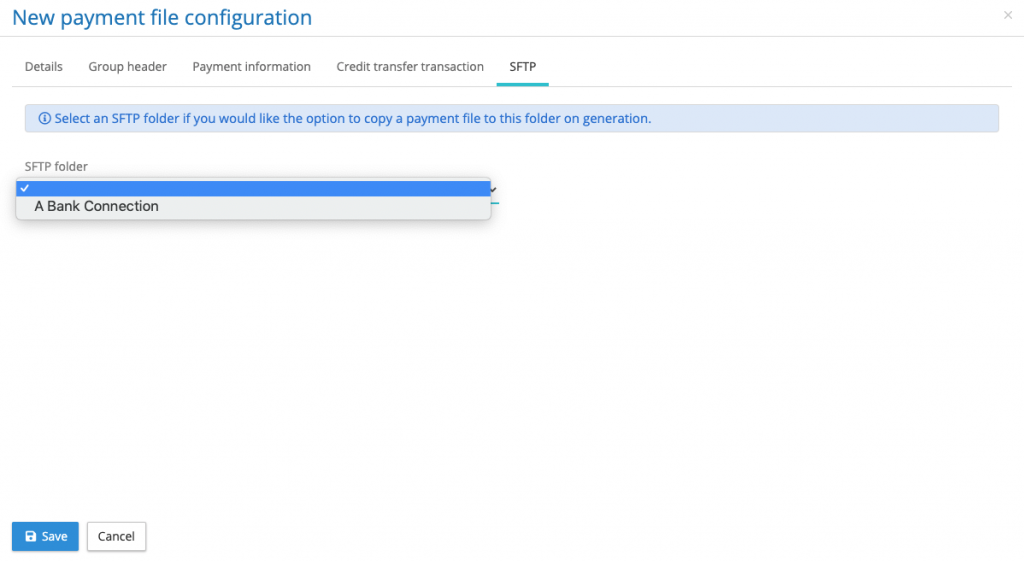
Select the SFTP folder and save the configuration. This configuration is now ready to be used with the SFTP connection.
SFTP User role
A user with payment file manager role can create a payment file, a user with the SFTP user role can access the SFTP folders to perform an SFTP transfer.
SFTP Payments Process
If a payment file is being sent to banking or payments partner via an SFTP connection, the payment process will be as follows:
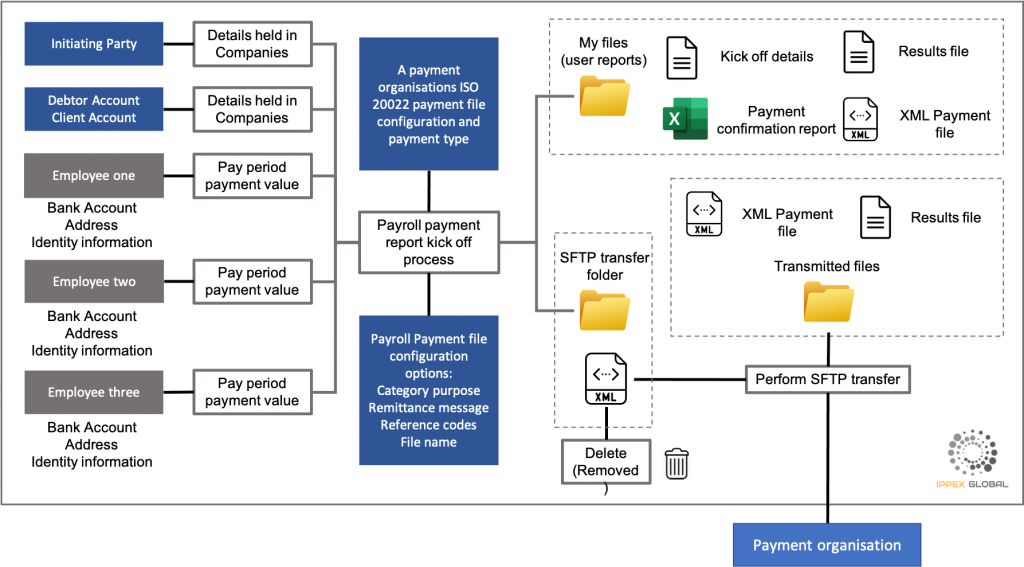
- To make payments through your banking partner a payroll payment configuration is required for each payroll using that payment service. The configuration contains debtor’s reference data, payment settings, payment type and creditor information including the payment category being used to retrieve the settlement amount and currency for each employee.
- If the payment file configuration is to be used with SFTP, it has to be configured with the designated SFTP folder, which can be setup by your system administrator.
- When running a payment report, after selecting the payment file configuration there is an option to copy the payment file (XML output) to the SFTP transfer folder. Check this box if your intention is to execute the payments
- Net pay (salary payment) values are uploaded or entered on screen against the employee for the pay period.
- When the SFTP option has been selected in the payment kick -off process, a copy of the XML payment file will be deposited in the users My Files folder structure along with a payment confirmation report, the details and result files. Another copy of the XML file will be deposited in the SFTP Transfer Folder located in the payroll pay period file structure.
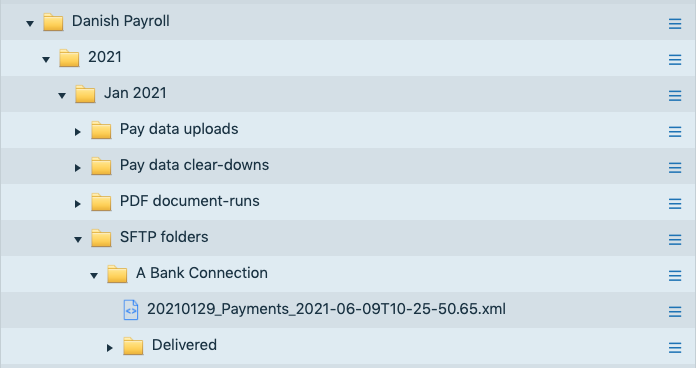
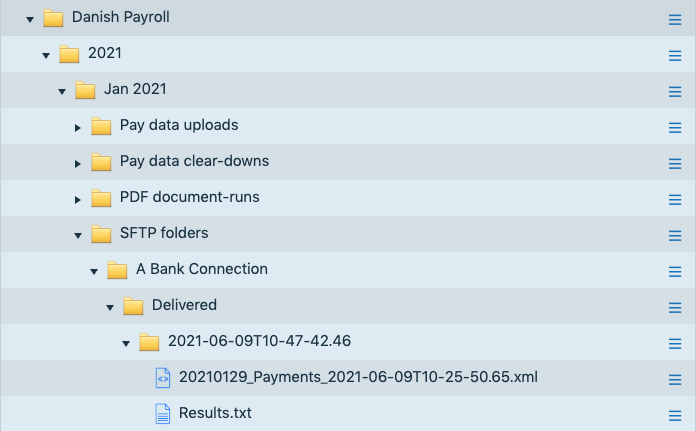
- The XML file in the SFTP folder can deleted if it is incorrect ensuring it is not transmitted to banking/payment partner. If the XML file is ready for transfer, using the action button against the file, click on perform SFTP transfer. The transmitted XML file will be removed from the SFTP transfer folder and copy placed in the transmitted files folder along with a results file providing an audit trail of who initiated the transfer and what was transferred.
- The banking/payment partner will receive the file, and depending on their system the file will be transacted or it will sit in the payment portal ready for further levels of authorisation and/or funding.
File Management Transfer Folders
Prior to the Version 1.22 Release, the file transfer folders were displayed as two folders each containing a name, one with – Inbox and the other with – Outbox. The image below showing an example set of transfer folders.
The transfer folders have been re-structured, with the transfer folder name followed by two sub-folders, one called Inbox and the other called Outbox.
A new function has been added to expand the inbox and outbox file structure to show all of the files.
Using the action button for the pay period, select Expand transfer folders, this will list all of the for each of the transfer folders for that pay period.
Full dashboard view for internal and third-party users.
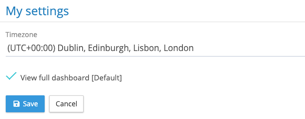
Internal users and 3rd party users have previously only had the option of a dashboard restricted to tasks allocated to their security group. New functionality provides an option where a user can check the ‘View full dashboard’ checkbox above the dashboard to view the full list of tasks.

Choosing My Settings from your profile, clicking on your login name, allows a user to set a persistent default for the View full dashboard option.
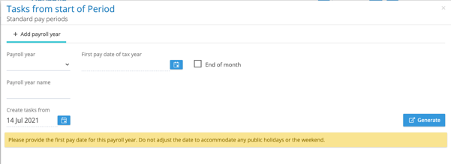
Task creation
To aid tenancy implementation and relax the rule of not creating Tasks prior to the date of the Period calendar creation, a ‘Create tasks from’ date has been added to first Standard Period calendar creation screen. When creating the first Period calendar for a new payroll the ‘Create tasks from’ date will default to today’s date. The date can be changed to allow the creation of tasks from antitime after the ‘Go live date’ specified in the payroll creation.
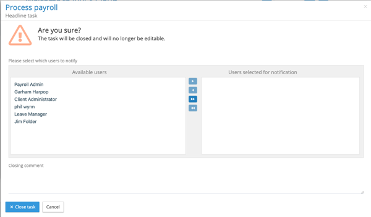
Task closing comment
The addition of a closing task comment has been included for all tasks. When closing a task, the user is prompted notify other users that the task has been closed, below the notification control is a new closing comment text box which allows the addition of a closing comment up to 256 characters in length. The closing comment will remain persistent on the closed task. If the task is re-opened the user will see a warning notice ‘The task will be re-opened and editable. Any closing comment will be removed.’ And if the user continues to re-open the task the closing comment will be removed and the task re-opened.
Task Offset values
This is a bug fix of offset values visible field width
We received a bug report that when the offset value on the task configuration control was incremented into double figures the control couldn’t display the full value. This has now been corrected.
