IPPEX Cloud V 1.17 Release Notes

Introduction
IPPEX have been providing GL Journal reports for over a year, in that time we have received a variety of requirements to extend the reporting capability. We are pleased to be releasing Version 1.17, which contains a collection of enhancements to GL code sets and the GL reporting structure.
There are three other important enhancements:
- User terms of use acceptance – All users have to accept the terms of use policy before using the system. The wording of the terms of use can be changed for a given tenancy.
- Adding a provider logo or provider wording to replace the IPPEX logo which is located in the footer of screen.
- A new single employee PDF upload facility for the manual upload of individual PDF documents.
We look forward to your teams utilising these new capabilities.
GL Grouping
GL Grouping has been added to the GL Code set and reporting configuration, this provides an additional level to the GL code + name combination. All existing GL code configurations will be unaffected by the addition of the GL Grouping during the deployment of the new version. The GL Grouping will be added to the existing GL code set with a null value.
GL Grouping + Name + code now creates a unique GL entry. To utilise the GL Grouping, new codes sets will have to be produced, existing codes cannot be edited to protect the GL Journal report history.
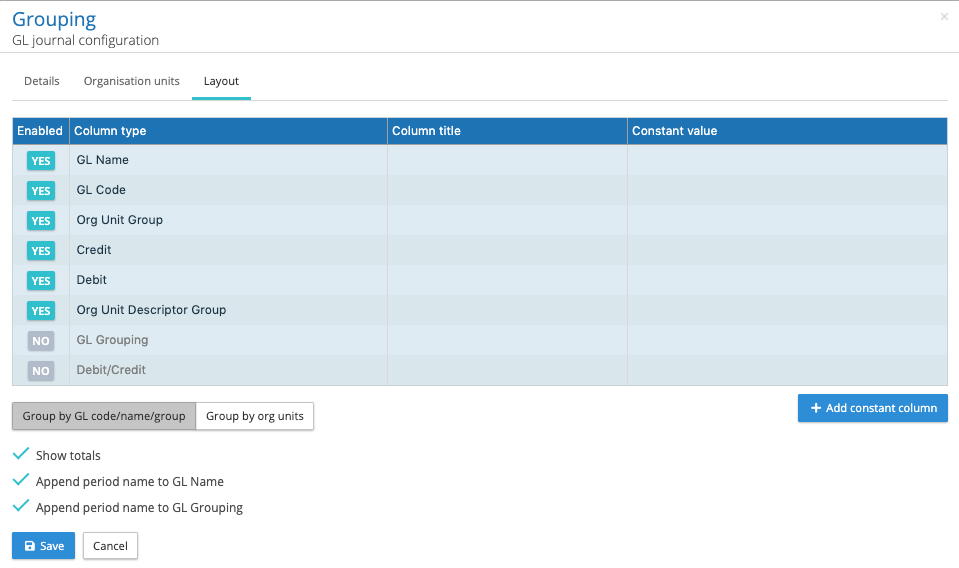
The GL Journal report configurations can be edited to include the GL Grouping. When GL Grouping has been enabled along with GL Name and GL Code, each unique grouping + name + code will be shown as a separate line provided there are values associated with a given combination. The report is grouped by code, then by name and finally by grouping.
The column order can be adjusted as before by dragging and dropping a column in a specific place with the GL report configurator. The following image shows debit codes group by payment type, this is a good example of expanding a simplified chart of accounts to give a more granular view of the payroll costs.
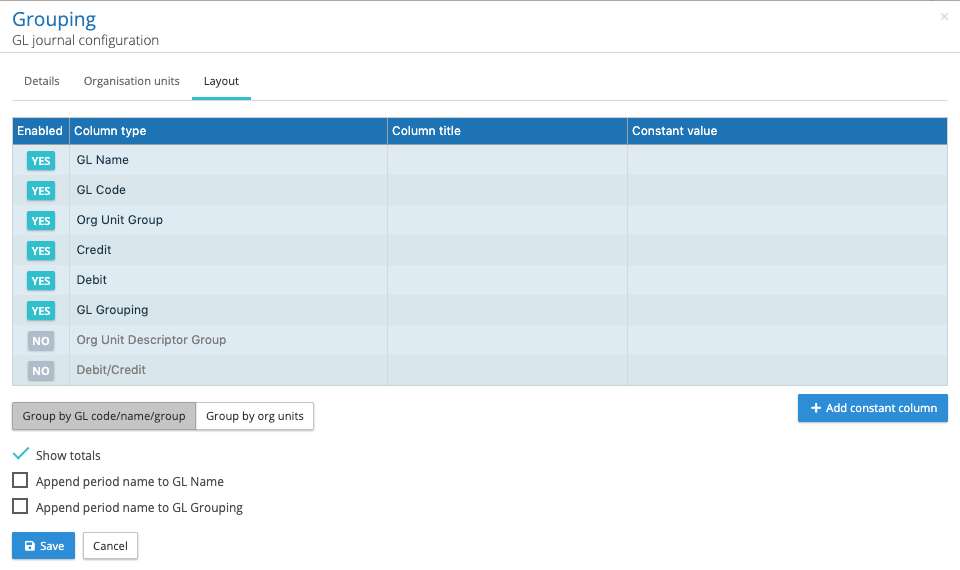
The following diagram shows the enablement of GL Grouping, placing the group after the debit and credits.
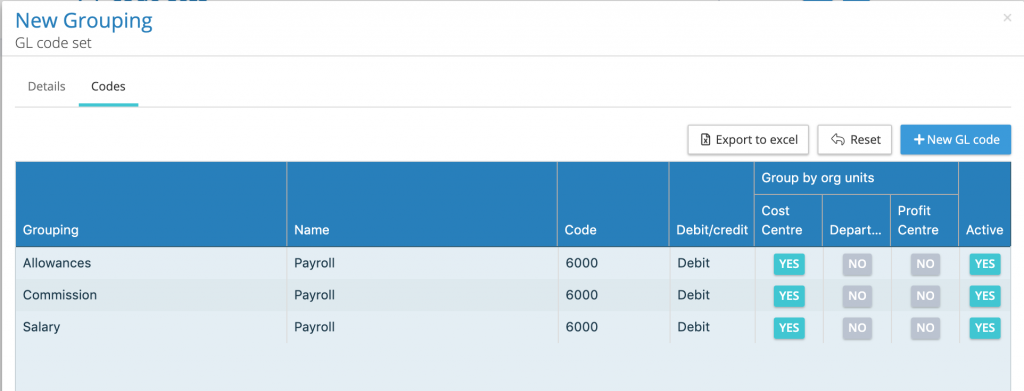
The proposed solution is to add GL code grouping to a GL Code Set. The following image illustrates the proposed configuration screen.
Pre-defined String Tokens
In version 1.16 IPPEX introduced the ability to add a constant column to the GL Journal, where the column is given a heading name and a constant value which will appear in each row of the column. The order in which a constant column appears in the GL Journal report can be changed by dragging the field to the right place in the list in the configurator.
The constant column function has been extended to include pre-defined string tokens. For example, some GL Journals contain data related to the payroll such as the pay period name, date of pay day, or today’s date. To avoid changing the constant column wording every pay period in the GL report configuration to reflect that pay period requirements IPPEX has introduced the ability to insert data from other parts of the IPPEX system. This way the information in the report is dynamically added when the report is generated, based on the pay period chosen in the report kick-off.
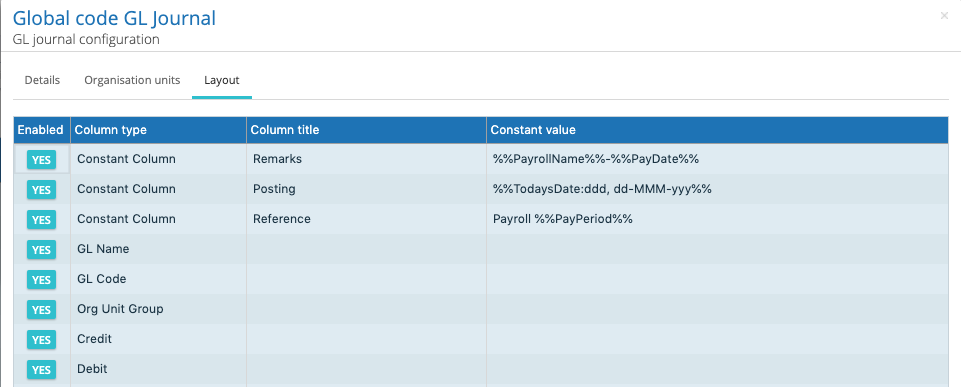
For some situations constant column data is a combination of information, for example a remarks column referencing the type of GL Journal and the pay period e.g. Pay 08-2020. (this is the combination of the word Pay and the system field containing the pay period)
The following pre-defined keywords can be entered into the constant column field in the GL Journal report configurator.
%%TodaysDate%%
%%PayDate%%
%%PeriodName%%
%%PayrollName%%
%%PayrollCountry%%
%%PayFrequency%%
%%PayrollCurrency%%
%%PaymentCurrency%%
For example %%PayrollName%% will insert the payroll name in the constant column when the report is generated. The pre-defined words have to be exact for the system to retrieve the value. The constant column field can contain more than one key words for example %%PeriodName%% %%PayrollName%% or the key word is combined with some text e.g. %%PayrollName%% GL Journal.
Two of the pre-defined date items can be specified to a further level of detail by optionally providing a date specifier after a colon defining the format of the date. The following are two examples:
%%TodaysDate:dd/MM/yyyy%%
%%PayDate:dddd, dd MMM yyyy%%
The default format without a specifier is based on the ISO (yyyy-MM-dd).
The date format string uses the following specifiers:
- d -> Represents the day of the month as a number from 1 through 31.
- dd -> Represents the day of the month as a number from 01 through 31.
- ddd-> Represents the abbreviated name of the day (Mon, Tues, Wed, etc).
- dddd-> Represents the full name of the day (Monday, Tuesday, etc).
- h-> 12-hour clock hour (e.g. 4).
- hh-> 12-hour clock, with a leading 0 (e.g. 06)
- H-> 24-hour clock hour (e.g. 15)
- HH-> 24-hour clock hour, with a leading 0 (e.g. 22)
- m-> Minutes
- mm-> Minutes with a leading zero
- M-> Month number(eg.3)
- MM-> Month number with leading zero(eg.04)
- MMM-> Abbreviated Month Name (e.g. Dec)
- MMMM-> Full month name (e.g. December)
- s-> Seconds
- ss-> Seconds with leading zero
- t-> Abbreviated AM / PM (e.g. A or P)
- tt-> AM / PM (e.g. AM or PM
- y-> Year, no leading zero (e.g. 2015 would be 15)
- yy-> Year, leading zero (e.g. 2015 would be 015)
- yyy-> Year, (e.g. 2015)
- yyyy-> Year, (e.g. 2015)
- K-> Represents the time zone information of a date and time value (e.g. +05:00)
- z-> With DateTime values represents the signed offset of the local operating system’s time zone from coordinated Universal Time (UTC), measured in hours. (e.g. +6)
- zz-> As z, but with leading zero (e.g. +06)
- zzz-> With DateTime values represents the signed offset of the local operating system’s time zone from UTC, measured in hours and minutes. (e.g. +06:00)
- f-> Represents the most significant digit of the seconds’ fraction; that is, it represents the tenths of a second in a date and time value.
- ff-> Represents the two most significant digits of the seconds’ fraction in date and time
- fff-> Represents the three most significant digits of the seconds’ fraction; that is, it represents the milliseconds in a date and time value.
- ffff-> Represents the four most significant digits of the seconds’ fraction; that is, it represents the ten-thousandths of a second in a date and time value. While it is possible to display the ten-thousandths of a second component of a time value, that value may not be meaningful.
- fffff-> Represents the five most significant digits of the seconds’ fraction; that is, it represents the hundred-thousandths of a second in a date and time value.
- ffffff-> Represents the six most significant digits of the seconds’ fraction; that is, it represents the millionths of a second in a date and time value.
- fffffff-> Represents the seven most significant digits of the second’s fraction; that is, it represents the ten-millionths of a second in a date and time value.
The above presents significant flexibility, however, the format definition has to be entered precisely to get the right output in the GL Journal report.
Add pay period name to GL Name or GL Grouping
At the bottom of the GL Report configuration on the layout tab are two new checkbox items, the first is to append the pay period name to the GL Name and the second is to append the pay period name to the GL Grouping. The pay period name is added after the GL Name/Group and does not affect the way the report is summated.

Reverse pay element value polarity
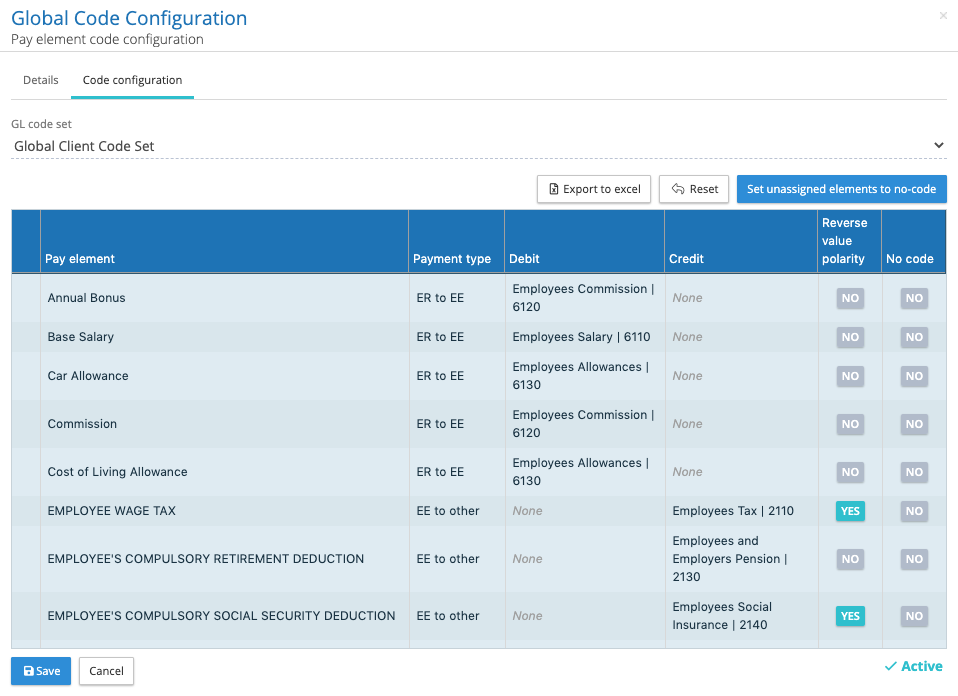
For some gross to net reports deductions are show as negative values, these require converting from a negative to a positive to produce a GL Journal. A new feature has been added to the pay element code configuration to convert negative values to a positive and a positive value to a negative. A new column called reverse value polarity has been added to the left of the No code column allowing for an individual pay element to be converted. See the example below where the employee wage tax and employee social security deduction has been selected to be converted.
When a GL Journal report is produced where the report configuration is based on a code configuration with reverse value polity enabled, each value associated with that pay element will be reversed.
GL code set field lengths and widths
The field lengths have been increases to 128 characters from 64, to accommodate longer names. The UI has been adjusted to increase the width of the GL Code column (please note the user interface is a responsive design, column widths will change as the browser is made smaller or larger).
Add Organisation Unit Description to GL Journal Report
An organisation unit value has a name and description, the GL Journal report configurator has been modified to allow the description to be included in the report. The new functionality provides flexibility in the report layout, to enable only those organisation unit descriptions required. In addition, the column headings can be changed for the organisation unit name and description. The following image shows the new Organisation units tab in the GL journal configuration.
- The organisation units can be enabled or disabled
- To re-order the unit’s aggregation, drag and drop the organisation unit name into the right place in the list.
- The GL Code set determines which organisation units are used to aggregate the data, the GL journal configurator determines the order in which the units are aggregated.
- An organisation unit column title can be changed.
- The organisation unit description can be included in the report, these are enabled separately.
- The descriptor column title can also be changed.
The organisation unit group and descriptor have to be enabled in the report layout. The org unit group will include a column for each of the names of the organisation units that have been enabled. The org unit descriptor group will include a column for each of descriptions which have been enabled.
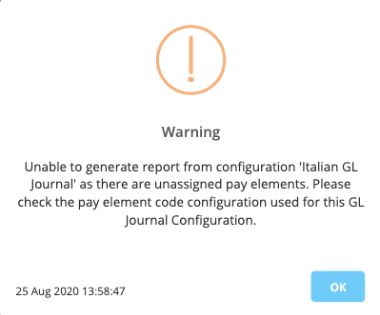
Kick off warning when a GL Journal configuration has unassigned pay elements
When new pay elements have been created during a post processing upload, these new elements will be unassigned from a GL Journal perspective. The system will now prevent running a GL journal report where the configuration and the associated pay element coding has unassigned elements. When the GL journal configuration is selected during the report kick-off the system will return the following message if there are unassigned elements.
Terms of use acceptance
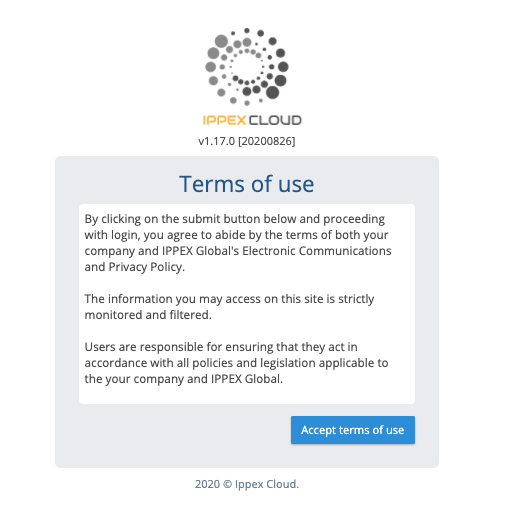
To align with the industry standards, IPPEX have introduced a one-time Terms of Use acceptance, that will be required by all IPPEX Cloud users. This new feature has to be enabled for a client tenancy. The default acceptance message refers to our Electronic Communications and Privacy Policy which we consider as being important to protect your organisation, your clients and IPPEX Global. The default message can be overridden by an administrative user at any time
When the terms of use have been enabled for a tenancy, all users, new and existing will be required to agree to the terms of use policies when they activate their user account (new users) or log into the system (existing users). The users will be presented with the following dialogue box, they have to accept the terms of use before they can proceed in the system. This is a one-time only acceptance. IPPEX have provided the following default wording, this can be replaced with your own wording for a specific client tenancy.
To enable the terms of use, go to administration > settings and proceed to the settings tab. Click on the check box next to enable terms of use.

The screen will expand offering the ability to add your message for that tenancy, this will replace the IPPEX default message. This is a rich text environment allowing for the inclusion of web links to policies.
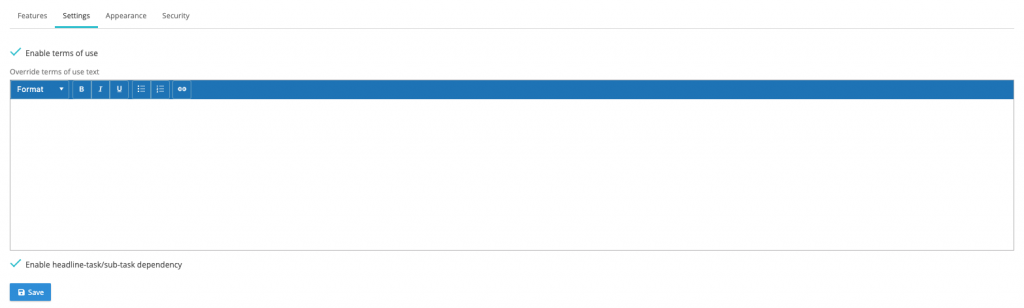
Please NOTE: as soon as the terms of use has been enabled, all existing users logging back into the system will be presented with the terms of use acceptance screen.
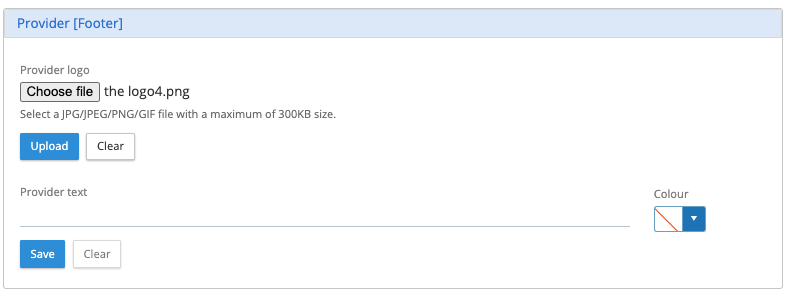
Adding a provider logo to replace the IPPEX Cloud logo
In addition to adding the client logo (top left-hand side of the screen) the IPPEX Cloud logo at the bottom of the screen (footer) can now be replaced with another logo or some text, this is intended for the provider organisation.
Go to administration > settings and select the appearance tag. There is a new panel for the upload of a logo or to enter some text. Please note the image size is limited to 300KB.
Single employee PDF manual upload function
All PDF documents that have been uploaded and stored in an employee folder have a specific naming convention. The naming convention is used by the IPPEX system to ensure the employee number in the document matches that of the employee user accessing the document and to display the document in the right pay period.
When system users are manually adding a document to the employee’s folder, it has been time consuming following the strict naming convention for the file, and sometimes mistakes are made resulting in the employee being denied access to the document. IPPEX has now introduced a single PDF document upload tool for an individual employee. This tool places the document in the manual upload folder for the employee with the appropriate file naming convention.
The payroll action menu has been changed, click on Employee docs and there are now two sub-menus PDF Document run and Single document upload.

Click on Single document run, it will present a new dialogue box.

Select the pay period, employee and document type and upload the file from either Local file upload or Storage file upload. If one or a number of payslips have failed to process during a PDF run, they are saved to a folder within the PDF upload folder called Undelivered documents. Using the single document upload, an individual payslip can the selected for upload to an employee.
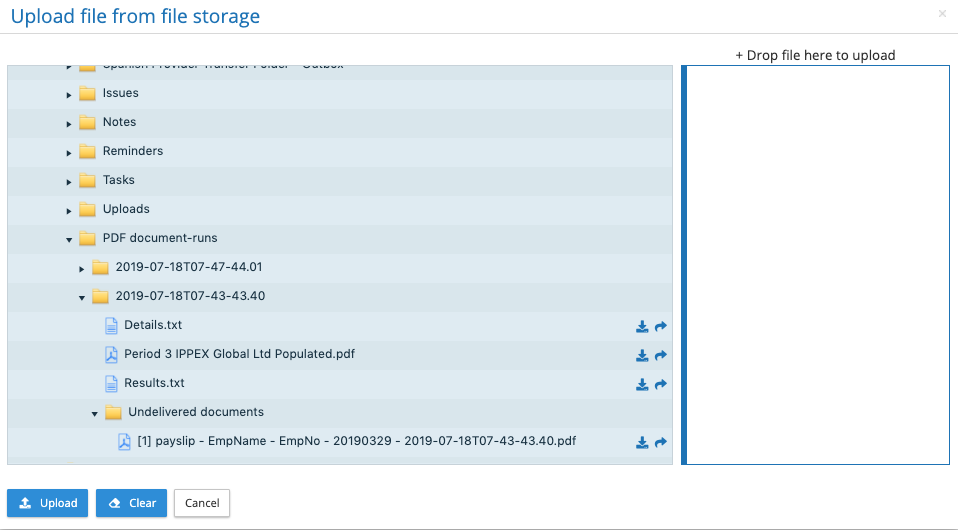
When viewing the documents in Files to select the right document for upload, the user can view or download a document from the upload screen (see action icons in the above image), to ensure you have select the right document for the employee. The right document has been selected click on upload and the document will be placed into the manual upload folder for the employee.
Subscription Start Date
The subscription term for a given tenancy commences on creation of the tenancy. The subscription start date has now been added to Settings under the Features tab.