IPPEX Cloud V 1.09 Release Notes


Introduction
The following document provides an overview of the new functionality released in Version 1.9.
Version 1.9 focused on two aspects of the system, PDF document upload and GL reporting.
IPPEX have enhanced the existing payslip upload mechanism and extended its capability to include other document types, providing a facility to distribute any PDF documents to the employees. Year-end and other statutory documents can now be uploaded to the employee hub.
The ‘Payslip run’ menu item has been changed to PDF Document run, expanding the upload process to include payslips and all other PDF documents. The upload mechanism common for all PDF documents. Payslip PDF documents are stored in the employee file system in a payslip folder and other documents stored in the document folder. Similarly, the employee will see two menu items on the employee hub, one for payslips and one for documents. A new lookup has been introduced called document types, which is user definable. This new lookup enables documents to be uploaded by category, such as a year-end statement or tax declaration.
In Version 1.7 we released the payslip upload facility, this has been very successful delivering payslips to employees in approximately 60+ countries, this figure continues to grow as new payrolls are deployed in each jurisdiction.
We have taken steps to reduce the risk of users creating multiple payslip run configurations for an individual payroll, and selecting the wrong upload configuration. The first step we have taken is to separate payslip configurations based on the number of pages per payslip, making it clear that a particular configuration operates on a specific number of pages per payslip, this requires a two-stage user selection. The second step we have taken, is to only allow one configuration to be active for each payslip type, a type being defined by the number of pages per payslip. More than one configuration can be saved against a type, but one can be active at any one time.
In Version 1.8 we created the foundations for GL journal reporting, we will complete the delivery of GL Journal reporting in a number of stages over a short period of time. Version 1.9 allows the production of a GL transaction report. This is a per payroll per period report, listing every transaction for that pay period, displaying the GL code, GL Name and organisational units relevant to the GL code for each transaction.
We are in the process of extending the scope of the user configurable GL Journal reporting tool to cater for a greater variety of reporting outputs, to be released in August. The GL Transaction Report provides an output which can be used to generate a GL Journal and serves as a tool to check the pay element GL configurations.
Please
ensure you read all of this document, as there are a number of other
enhancements to the system which could be relevant to your organisation.
PDF Document Upload
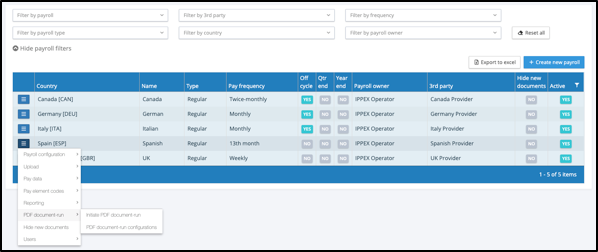
From a payroll action menu, you will see ‘PDF document- run’, this replaces the earlier ‘Payslip-run’. There are two options ‘Initiate PDF document-run’ and ‘PDF document-run configuration’. IPPEX Cloud provides the facility to upload PDF payslips and other PDF documents.
Document Keys
The term payslip key has been replaced by document key, and the number of usable keys is increased from three to ten. This allows additional keys to be used by other document types. The example shown below has five document keys populated, for an employee. Any number of these keys can be used for a specific upload of a payslip or a document. The minimum number of keys that can be used to match an employee on one, however, to reduce risk and to ensure documents are placed with the right employee we recommend using a minimum of three keys, and where possible utilising a unique identifier such as a tax reference.
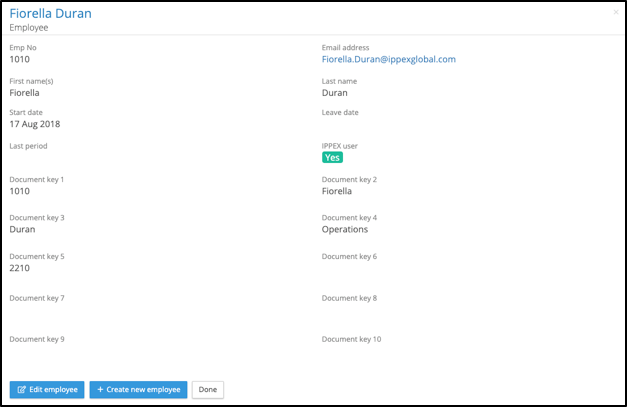
Document keys can be either manually entered into the employee record on screen (from the action menu against an employee, select view employee then select Edit employee) or added/edited using employee upload.
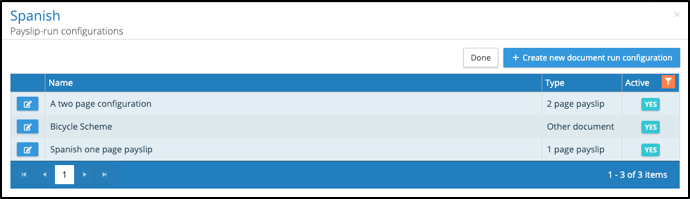
PDF Document-run configurations
The payslip-run configurations have been replaced with PDF Document-run configurations. The configuration allows for the following types:
- 1 page payslip
- 2 page payslip
- 3 page payslip
- Other document
When creating a new configuration, a Name, Description (optional) and the JSON code is required.
‘Other documents’ will require selection of Document Type.
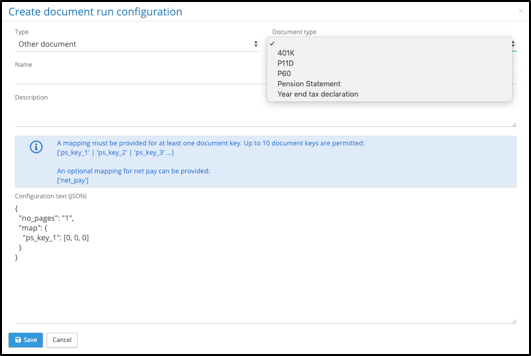
The application will hold configurations for each document type. The document type will be shown against the document when viewed by an employee, so it has to be meaningful to an employee, e.g. UK P60 is the annual tax declaration. Document types are definable by client tenancy, see Lookups. If the document type does not exist in the drop-down menu, add it to the lookup list (Tenancy Administration privileges will be required).
IPPEX Cloud will only allow one active configuration per payslip and other document types (other documents). The application will allow for any number of inactive configurations, to change the status of a configuration from inactive to active, click in the action button next to the configuration and change the status to active. When saving the change the application will present a warning, explaining if you save the configuration the existing active configuration will be changed to inactive. Similarly, if you are creating a new configuration for a payslip run that has an existing active configuration, the system will present a warning, explaining if you save the new configuration the existing active configuration will be changed to inactive.
Lookups – Document Types
Before other documents types can be uploaded, a list of document types have to be produced. Select Administration ® Lookups, to see a new category, Document Types. (Tenancy Administration privileges will be required).

Document type is similar to other lookups, select ‘+ new document type’ to add a new type. Translations can be added to a document type and document types can be set to inactive so they cannot be selected in future ‘Initiate document runs’. The employee will continue to see and access any historic documents uploaded with the inactive document type.
To add a translation to a document type, select the action button next to the document type and select view lookup translations.
Initiate PDF Document Run
‘Initiate Payslip-run’ has been replaced by ‘Initiate PDF Document-run’, enabling the upload of payslips and documents using the document-run configurations.
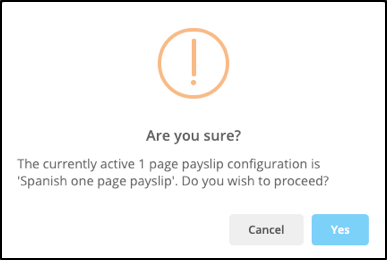
The PDF Document Run process is the same as the Payslip Run Process, with the exception that you are selecting a document type and not a configuration. Only one configuration can be active against a document type, therefore by selecting the document type it automatically selects the active configuration. The system will provide a warning stating the configuration selected and asking ‘do you wish to proceed’.
A reminder will be displayed, before you initiate a PDF Document Run, click on ‘Hide new documents’. The Initiate PDF Document-run steps are as follows:
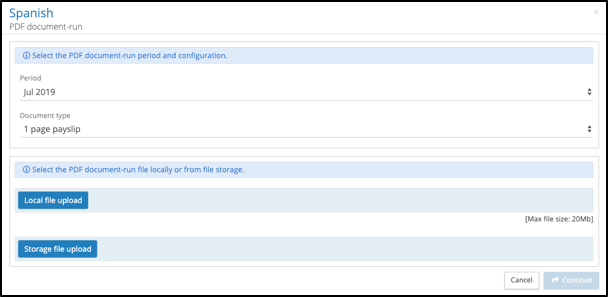
Make the following selections:
- Period – It is important to select the correct pay period for an upload, as the document date becomes an integral part of the file name and this is displayed along with the document helping to show documents in chronological order to the employee.
- Document Type – 1 page, 2 page or 3 page payslip, or one of the document types defined in the Lookups that have an active configuration for this payroll e.g. Tax Declaration, Vacation Scheme….etc. When selecting the document type a warning will appear on the screen (see below).
- Local File or Storage File upload – Select the PDF document from the file storage.
- Continue – You will be asked to confirm delivery of documents to all available or selected employees.
When selecting the Document Type the following warning will be displayed detailing the active configuration for this document type and confirming if you wish to proceed.
The final steps in the PDF document run are as follows:
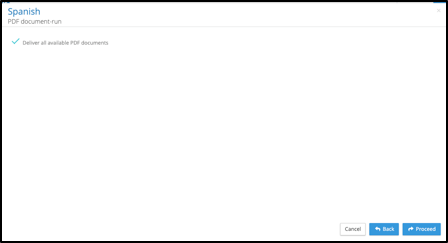
You have a choice to deliver all available PDF documents or uncheck the box to select specific users to be processed in this PDF document run.
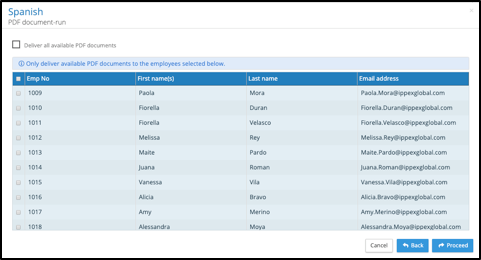
Select the employees and click on proceed, and the PDF Document Run will carry out the process in the background.
File Management – Employees
The employee folder structure in File Management has been expanded to two folders, one for PDF document-run uploaded documents and one for manually uploaded documents. IPPEX’s goal is to add more controls to the upload process, documents cannot be manually uploaded to the PDF document-run files folder.
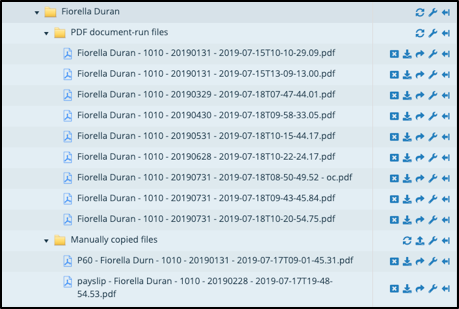
Payslips and Other documents uploaded by a PDF document-run will appear in the PDF document-run folder displayed in order of pay period and processing time stamp.
Documents can be manually uploaded to the Manually copied files folder, these require a precise naming convention, as seen in the above diagram. The naming convention enables the document to be ordered in the employee view (PDF payslips and PDF other documents).
Document Type – Employee Name – Employee Number – Pay Date – Date + Time
The document type text has to match one of the document types defined in the Lookup table. The example in the diagram above is P60 which is a document type and the other example is the manual upload of a payslip. When naming a file, a quick way to do this is to copy a file name from a previous upload, and edit the type, pay period and date + time stamp as needed. Each element of the file name must be separated with ‘ – ‘, (space – space)
Employee View
The employee view now has two menu items, payslips and other documents. Both views list documents by tax year, with a horizontal tab per year (Note the tax year tab appears when there are documents present in more than one tax year)
The payslip view remains unchanged:
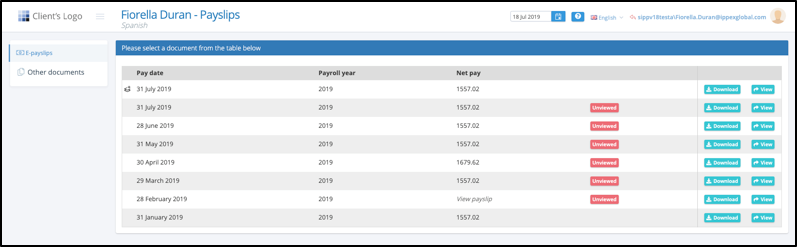
NOTES:
- If a PDF Document run configuration is able to extract the net pay figure this value will be displayed as available.
- Payslips manually transferred to the employee’s folder will not display the net pay figure, will show ‘View payslip’.
- Payslips uploaded to a supplementary period such as an off-cycle will have a symbol in front of the pay date identifying it an additional off-cycle payslip.
Other documents, displays the documents by tax year and includes a column showing the document type.

GL Transaction Report
The GL Transaction Report combines the payroll transactions with the employee cost centre(s) and GL codes. The report is made up of one line per transaction for any given pay period. The GL transaction reports following data items:
- Tenancy ID
- Payroll Name
- Pay Period
- Pay date
- Employee Number
- First Name
- Last Name
- Pay Element
- Value (in payroll currency)
- Debit GL Name
- Debit GL Code
- Org Unit(s) – One or more columns based on the number of org units enabled
- Credit GL Name
- Credit Code
- Org Unit(s) – One or more columns based on the number of org units enabled
From the payroll action menu, select the payroll action button and select Reporting ® GL transaction report. A report kick-off screen will be displayed:
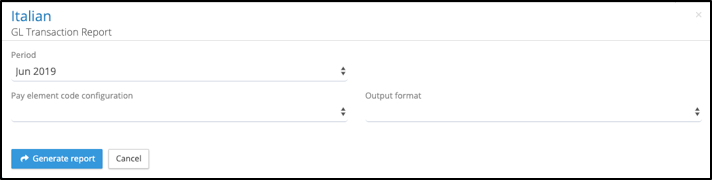
Make the following selections:
- Pay period for the report
- Pay element code configuration (this defines the assignment of GL codes to the pay elements for this payroll). The GL codes are held in a GL Code Set, and each debit or credit code specifies if it is grouped by one or a number of organisation units.
- Output format which is either Excel or CSV.
Next click on generate report, similar to all other reports it will be run as a background task and then saved to your My Files folders. The following provides the business rules applied to the transaction report.
- The transaction report is based on the uploaded post processing data
and will list all of the transactions:
- The assignment of codes to
pay elements will vary according to the GL reporting, the following is an
example:
- Gross payment, such as salary, will have a debit code assigned and will be grouped by one or more organisation units.
- Total Gross Pay will have no GL code assignment
- Pay elements such as net pay will have a credit code assigned
- Pay elements such as employers social insurance payments will have a debit and credit code.
- The assignment of codes to
pay elements will vary according to the GL reporting, the following is an
example:
- The transaction report will only show the org unit values where the GL Code Set has defined a grouping for a specific GL code.

Validating the Pay Element Code Configuration
The following is a quick way to validate a Pay Element Code Configuration, ensuring that that the correct assignment of GL codes to pay elements have been made. Open the transaction report for a payroll and pay period and create two pivot tables, one for credits and the other for debits. The following example is based on a GL Journal which is grouped by GL Code and one organisation unit called Cost Centre.

Take the following actions:
- Create a pivot table selecting all of the data in the transaction report
- Add the Debit GL Name, Debit GL code and Cost Centre to the Rows section of the report
- Add the transaction value in the Values section of the report.
- At the top of the pivot table results, click on the filter and remove blanks from the GL Code, the result will be a table of transactions summed by cost centre and by GL code.
- Report the same process with credit pivot table, note the second column for cost centre will have a bracket (2)
- Providing the post processing data did not contain any rounding errors, for things like net pay, and the pay element code configuration is correct, the debits and credits will balance.