IPPEX Cloud V 1.46 Release Notes

Introduction
Version 1.46 focuses on a variety of enhancements to GL Capabilities, including the introduction of additional pre-defined string tokens and additional report configuration features. Version 1.46 also introduces the GL Report User, expanding the user base capabilities of the platform. Also included is the ability to create a Year End folder for payrolls. Finally, version 1.46 includes the ability to assign split organisation units to employees.
GL Enhancements
Pre-Defined String – Header Name with a Row Count
GL Reports can now include a pre-defined string which allows for a row count column within the GL Reports. This can be added as a pre-defined string. To include this in a GL Report, you must go to Payrolls > Reporting > Configurations > GL Journal.
In the ‘Layout’ Tab of the GL Report Configuration, users can select the ‘+add constant column’ button:

You can then title your constant column header as required. For the value, you will want to add the following:
%%RowCount%%
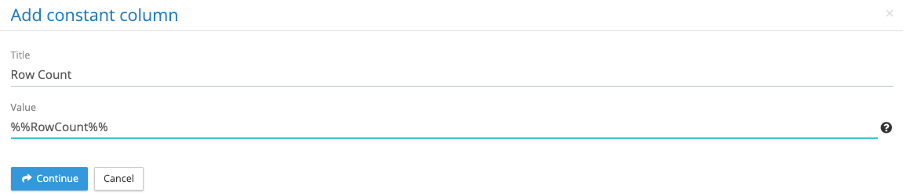
This will include the automatic row count when running a GL report in the specified column.
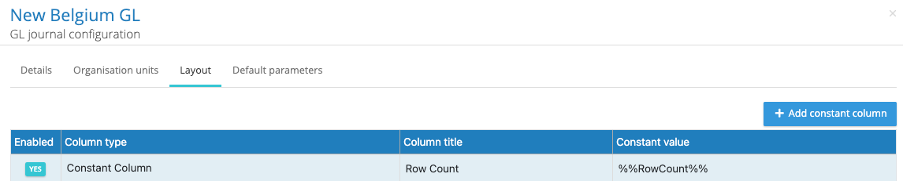
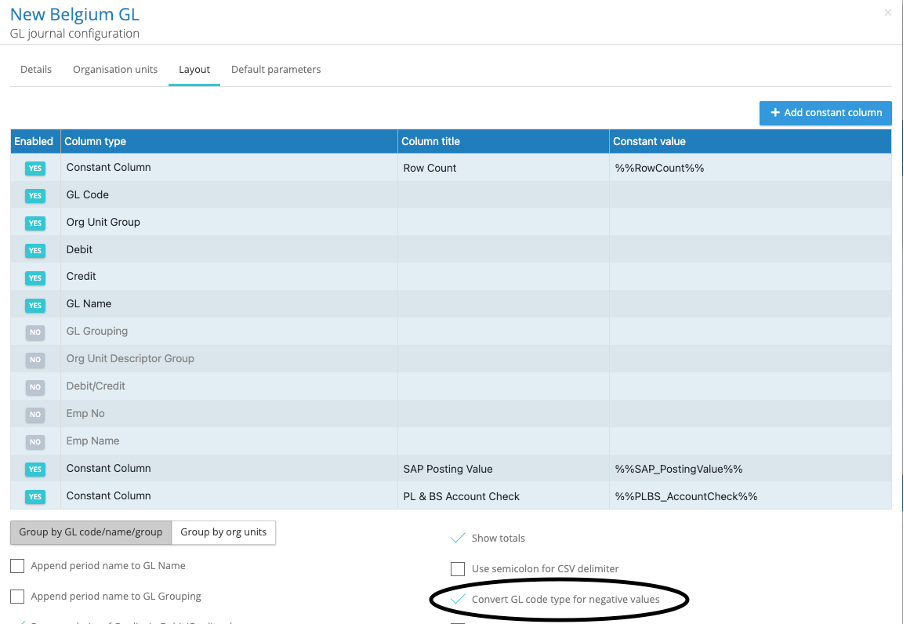
The constant column should then appear within the GL Configuration Layout:
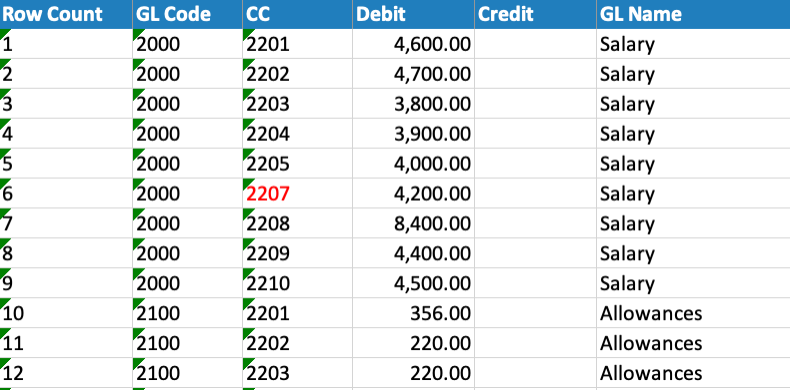
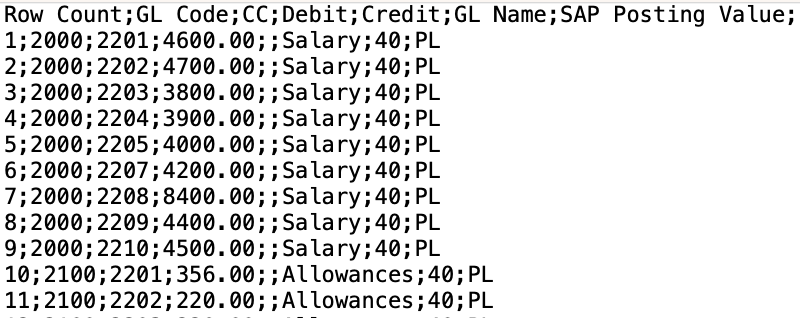
When you run a save down the updated configuration, the new column will appear when you run a GL Report:
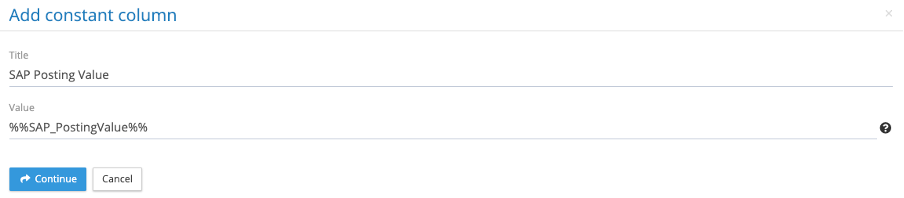
Pre-Defined String – SAP Posting Value
GL Reports have the capability to include the SAP Posting Value as a constant column. The constant column, when created, will assign the posting value of 40 to Debits, and 50 to Credits. This will allow for a direct uploading of formatted GL Reports to SAP.
To add this you will want to create a constant column, name your column headed as needed, and add the following pre-defined string:
%%SAP_PostingValue%%
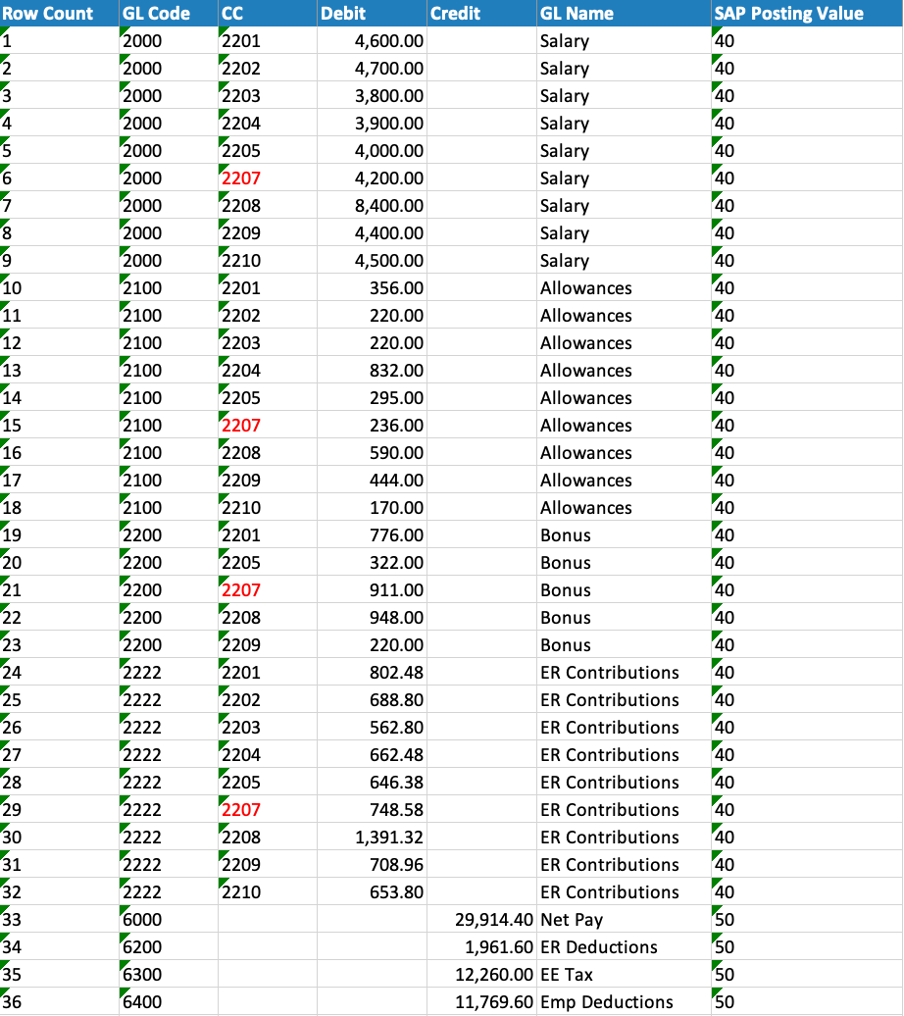
Once saved down, the column will appear on GL Reports:
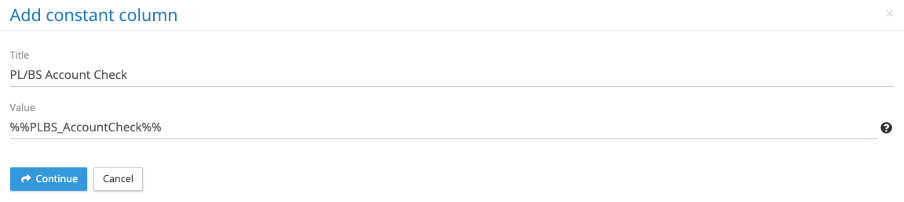
Pre-Defined String – PL/BS Account Check
GL Reports have the capability to include a PL/BS Account Check as a constant column. The constant column, when created, will assign the posting value of PL to Debits, and BS to Credits.
To add this you will want to create a constant column, name your column headed as needed, and add the following pre-defined string:
%%PLBS_AccountCheck%%
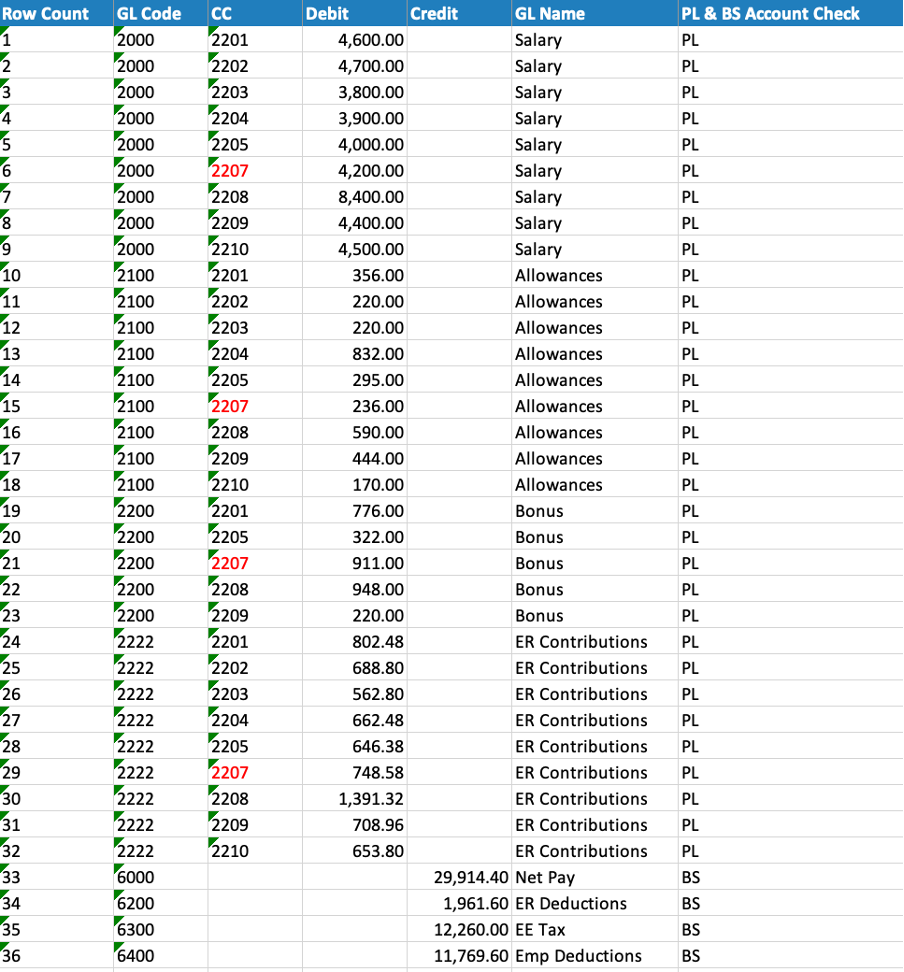
Once saved down, the column will appear on GL Reports:
Negative Debit Switch to Credit
GL Reports can now be configured to change the GL Type based on if a negative value appears. So any negative debits can be automatically made Credits, and any negative credits can be made debits. This would ensure correct reporting for organisations that require no negative values on GL Reports.
To do this, you must go to Payrolls > Reporting > Configurations > GL Journal. There you will want to select the option ‘Convert GL code type for negative values’:
Upon selecting this, GL Credits will successfully convert code types if a negative value is to appear on the reports. This will apply to both debits/credits in a single or separate columns.
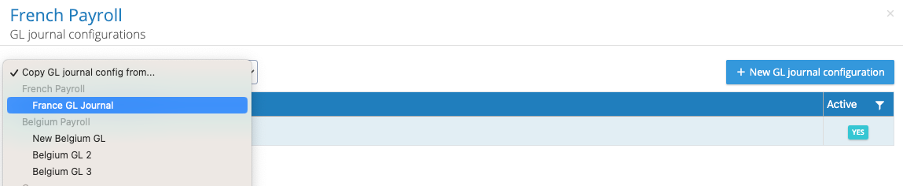
Copy GL Journal Report Configuration
GL Journal Report Configurations can now be copied to allow for streamlined creation of other GL Reports. To do this, you must go to Payrolls > Reporting > Configurations > GL Journal. There at the top of the page there is a drop down list titled ‘Copy GL Journal Config From…’:

There you can select which of the current GL Configurations you would like to copy:
Once selected, the new configuration page will appear with the ‘Details’ tab to be filled out by the user, while the ‘Organisation units’ and ‘Layout’ tabs will reflect the copied configuration. Once the new configuration is named and the pay element code configuration is selected, the new report can be saved down, ready for use.
Delimiters for CSV to Semicolon
GL reports run as a CSV file can now have Semicolons as delimiters. To set this up, you must go to Payrolls > Reporting > Configurations > GL Journal. There in the ‘layout’ tab, you can select the option ‘Use semicolon for CSV delimiter’:

Once selected, GLs running as a CSV file will have semicolons in place of commas:
Remove Commas from 1000s
GL reports can now have commas removed from numbers in the 1000s. To set this up, you must go to Payrolls > Reporting > Configurations > GL Journal. . There in the ‘layout’ tab, you can select the option ‘Remove number formatting’:

Once selected, GLs will remove the commas from numbers in the 1000s in the report:
Inactive Org Units
Org Units can now be made inactive on IPPEX Cloud and will be reflected in both employee profiles and IPPEX Reports.
To do this, go to the Administration > Organisation Units and select the ‘Organisation Unit Values’ Button:
Then in your list of org units, you can select a unit to be made inactive on the right hand side of the list:


Once turned off and saved down, the org unit will now indicate as made inactive if it is still assigned to an employee by appearing in red with [Inactive] appearing next to the value:
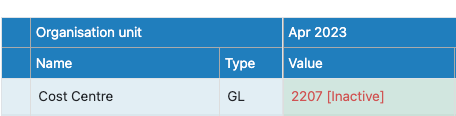
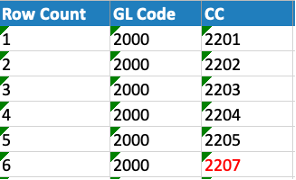
Additionally on reports, if any org units made inactive appear, they will also display in red:
Separate GL Report User
IPPEX Cloud now has the capability to assign system users the access to GL Reports only.
This can be achieved by going to the user menu of a system user and selecting the following permissions:
- File Manager
- GL Report User
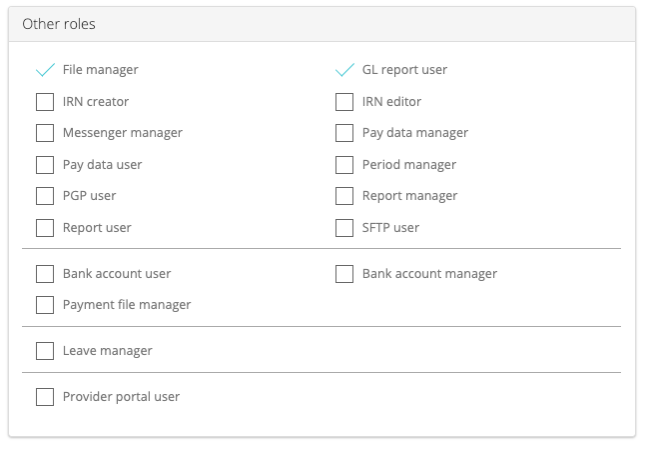
IMPORTANT: For Users who are meant to only have access to running GL Reports, ensure these two permissions are selected ONLY. Ticking additional permissions will result in the user having access to additional data and/or reports.
System Users – Export to Excel Enhancement
IPPEX Cloud now includes the following additional columns:
- Initiated On – The date the Export was performed
- Last Modified On – The date a user was last modified
- Last Modified By – The user who last modified the user in question
- Created On – The date a user was created
- Created By – The user who created the user in question
- Last Login Date – The date a user last logged in
Year-End Folders
IPPEX Cloud now has the ability to create year-end folders for payrolls that appear as a file sharing space for year-end documents. The access to these groups can also be assigned based on the payroll groups with access to the payroll.
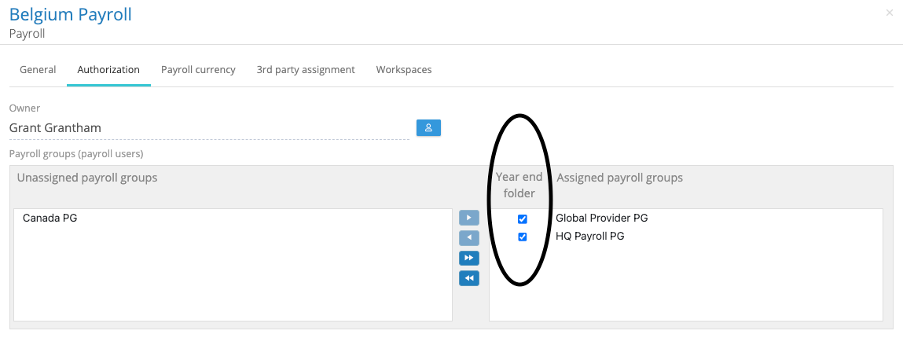
To include the use of year-end folders, you must go to Payrolls > Edit Payroll. There in the ‘authorization’ tab (where the Payroll Groups are assigned to a payroll) you can now select a box titled ‘Year end folder’ next to each payroll group you would like to authorise access to the year-end folder for that particular payroll:
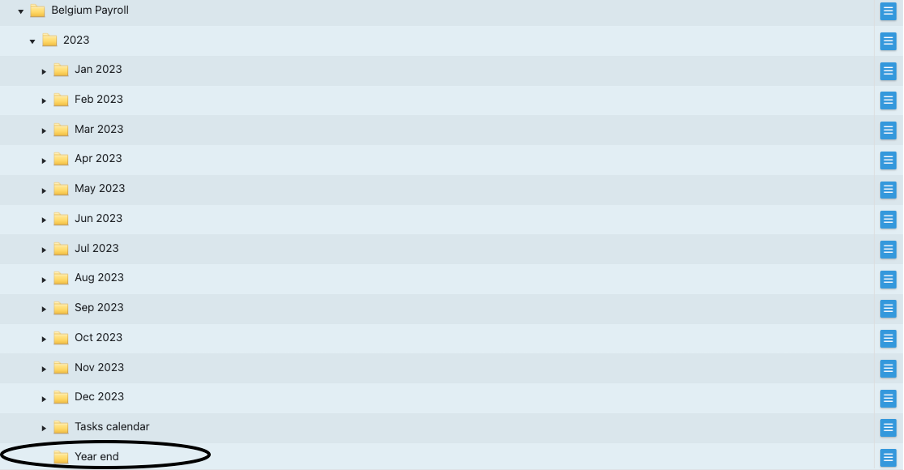
Once authorising access, the selected payroll groups can now access the year-end folder located at the bottom of each payroll year within the ‘Payrolls’ folder:
Split Organisation Units
IPPEX Cloud now has the ability to have split organisation units, where a user can up to 3 values of one org unit type to an employee for GL Purposes. A user also has the ability to allocate the split percentage of the org units to determine the allocation amounts.
There are different ways split org units can be allocated to an employee. The first is via user interface. To start, a user should access the employee profile by going to Payrolls > Pay Data > Employees. From there you can select the employee in question and go to the ‘organisation unit values’ section of their profile:
Start by editing an employees active org units:
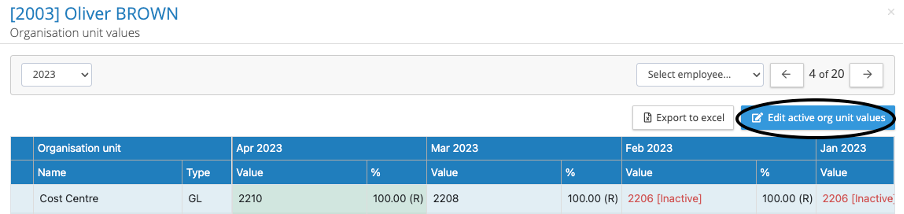
Then select the action button on the right side of the menu:

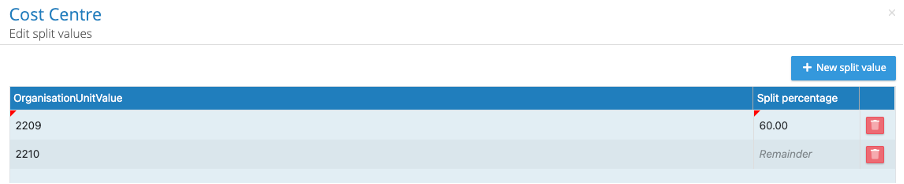
There you can select the additional org unit to be applied against the employee. Once selected, you will assign the split percentage to one of the org units. Once a split percentage is applied, the org unit with no percentage assigned will take on the remainder of the amount. (for example, a split percentage of 60 to cost centre 2209 will leave cost centre 2210 with a remainder of 40 percent).
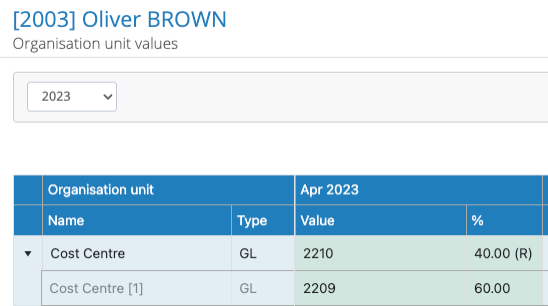
Once saved down, you can see the org units with their respective split amounts against an employee’s profile:
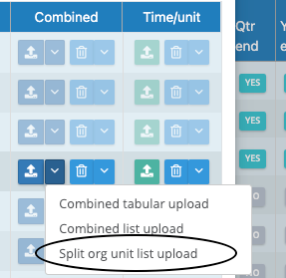
Split Org Unit allocations can also be assigned to employees via a template upload. To do this you will want to go to Payrolls > Upload Control Panel. From the control panel, select ‘Split org unit list upload’:
The list upload template should be formatted with the following required fields:
- Employee Number
- Element (the Org Unit in question)
- Value (the Org Unit value to be assigned)
- Split (the split percentage to be assigned)
First and Last name are populated as references only.
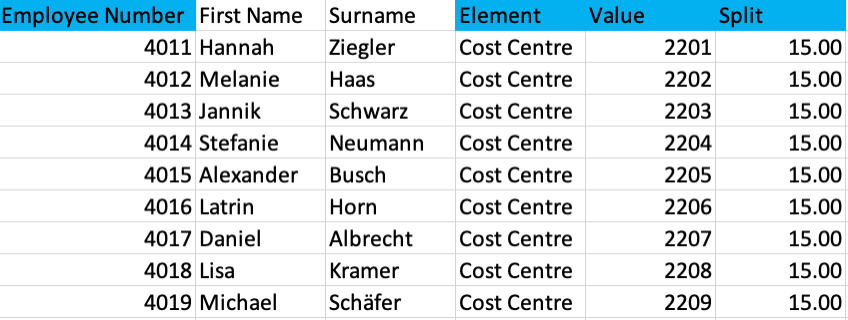
The percentage amount not included in the template will be allocated as the remainder percentage. (for example, an allocation of 15 percent in an upload template, will leave the remainder of 85 percent for the remaining org unit assigned to the employee)
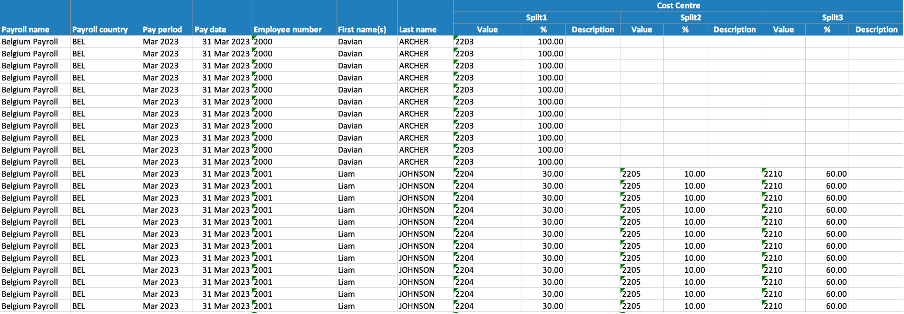
To check the org unit split amounts for employees, a user can view the data via a transaction report. In the report, the split amount of the org units will be accessible: